
Online Documentation for SQL Backup for SQL Server
Specifying the elements of backup
This step allows you to select history that will be used to restore the database. This step is not available if Files has been selected as backup source at the previous step. The order is generated automatically by SQL Server based on Log Sequence Numbers. If several sequences are available, the program selects the shortest one, consisting of local files. You can select the required sequence manually using ![]() and
and ![]() buttons.
buttons.
Backup set parts necessary for successful database restore process should be selected carefully. Please check that all backups required for full restore are selected.
To work with encrypted backups, enter the password by pressing the Set password button or double-clicking the required backup.
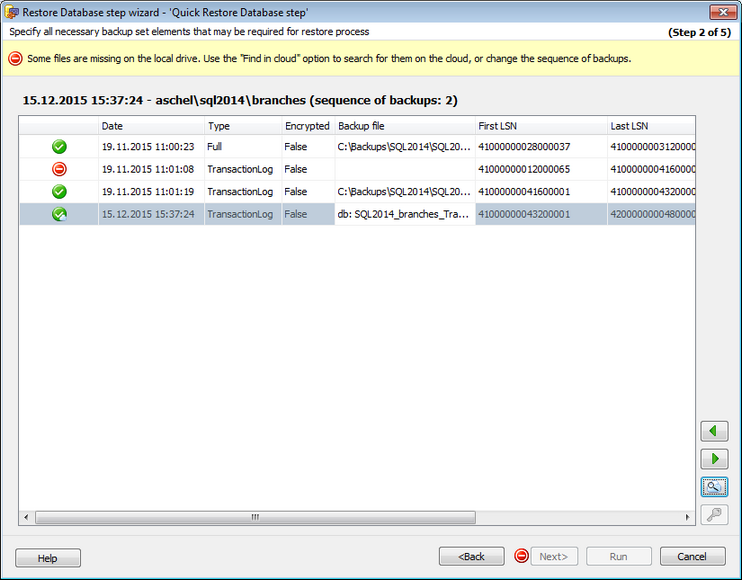
The first column indicates whether the file from the set is available for restoring or not:
![]() - backup file is found on the local drive;
- backup file is found on the local drive;
![]() - backup file is found in the cloud storage;
- backup file is found in the cloud storage;
![]() - backup file is not found.
- backup file is not found.
In the Backup file column you can see where the file is located - the local path or the cloud storage.
If the file is not stored locally or was not found automatically in the cloud, you can select this file in the list and click the ![]() Find in cloud button.
Find in cloud button.
In the opened Select cloud dialog you need to add clouds where the backup file will be searched.
By default, this dialog lists the clouds where the backup file can be probably situated - clouds that were specified during the backup and in the similar cloud storages from the Cloud Connections list.
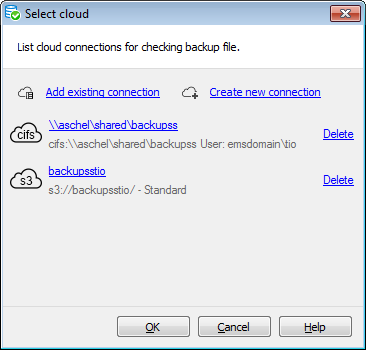
You can create a new connection or add an existing one. On adding an existing connection you will be offered to choose among connections specified in Cloud Connections tab of the Options dialog.
If you create a new connection then after specifying its properties you will be offered to save it, so this connection will be available in Cloud Connections.
To change connection parameters click on its name. Depending on connection type the relevant dialog for configuring connection settings will be opened.
After you have specified clouds, click the Ok button to start searching. The search is performed in the clouds one after another; when the file is found on one of the clouds you are offered to use this cloud and stop searching. You can continue searching as well.
After all backup files are found click the Next button to proceed to the Defining target database parameters step of the wizard.
Note: If you have files found in clouds you will be offered to download them before proceeding to the next step. It is necessary action for the database restoring. Files are downloaded to the folder that was specified in the backup settings.


