

The log shipping mechanism is envisaged to increase the failover protection of DB configuration in Microsoft SQL Server. Its essence reduces to the copying of the DB transaction log backup files of a single instance of SQL Server to another instance and subsequent restoring them to the target database without providing shared access. Control of the backup file copying and restoration process while log shipping automation may present a certain difficulty because any “missed” backup file on the target server will lead to impossibility of applying the subsequent files and the neсessity to restore from the full DB backup.
EMS SQL Backup gives convenient tools of automation and control of the log shipping process that are to be reviewed in this article with specific reference.
In order to adjust log shipping in the program one should perform the following preparatory actions:
- Register both instances of SQL Server (primary and secondary) in the SQL Backup administrative console;
- Install SQL Backup server-side components on both registered instances;
- For the sake of policy management convenience one can create a separate solution and drag the servers there.
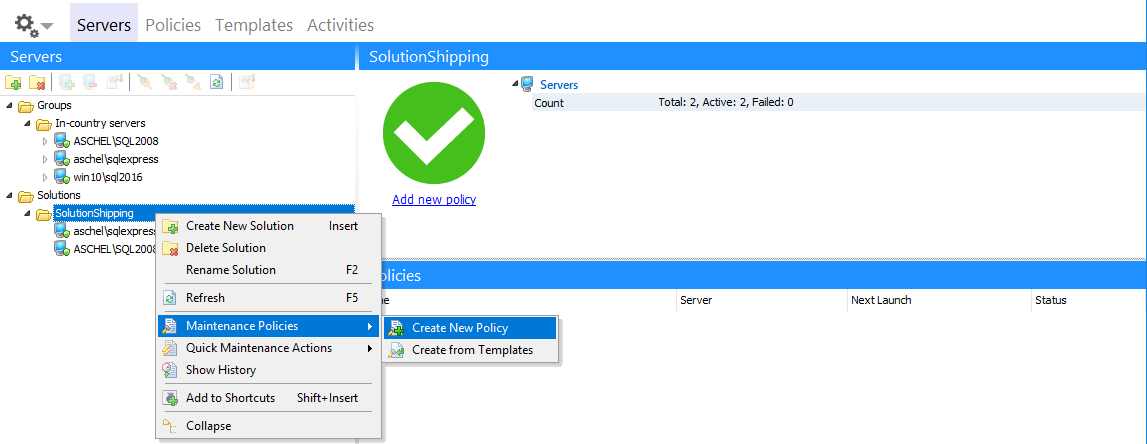
Policy creation
Now we can start creating and configuring the log shipping policy. To create a policy we should right-click the solution and select ‘Maintenance Policies | Create New Policy’ in the context menu.
At the first step of the opened wizard we should enter the policy name and set the time application rule of its execution in the ‘In different time zones schedule tasks on basis of’ section. For the log shipping it is important to provide the synchronization of tasks execution on the primary and secondary server that may be in different time zones, that’s why it is required to choose the ‘Home time zone...’ value.

In this case the policy starting time on each SQL Server instance will be calculated in such a way that it coincides with the required time of the client machine (on which the EMS SQL Backup console is installed). It is noteworthy that mal-synchronization of the task execution time on two instances will not lead to the policy failure. If at the first policy start the task initiation on the target server takes place earlier than on the primary one, the status of the first performance is erroneous, however all the subsequent start-overs will be successful.
At the first step of the policy creation wizard it is necessary to add the task step and set its schedule. When adding the step one should select the type ‘Transaction Log Shipping’ to open the wizard for the log shipping step configuration. At the second step of this wizard we must choose the primary SQL Server instance in the dropdown list ‘Source server’ and target SQL Server in the dropdown list ‘Destination server’. All Databases of the primary server will be represented in the table:
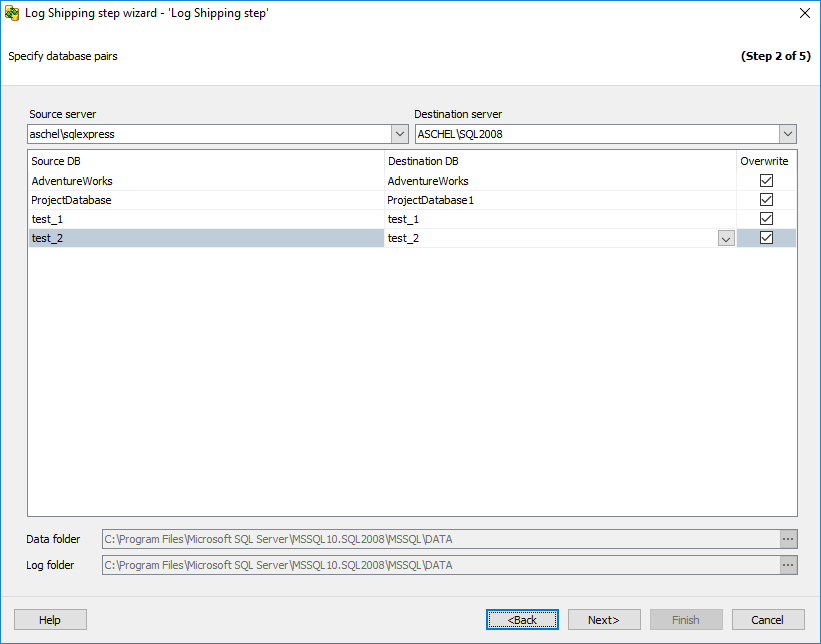
The target database should be selected in the list of ‘Destination DB’ field and then one should click the ‘Overwrite’ option. In case the ‘Overwrite’ option is checked when creating and applying the policy settings the full database backup copy will be transferred and restored with the replacement option on the target server. While restoring database files will be created in the directories that are set in the ‘Data folder’ and ‘Log folder’ fields of the target server, if necessary the directories can be changed.
The settings of the third step of the wizard can be left unchanged and then we go to the 4th step. Network directory which log backup files will be copied through should be set in the ‘Network shared folder’ field.

Directory may be located on the machine of the primary, secondary SQL Server or on the third machine, which is in the local network and accessible via NetBIOS. The path is set in the UNC (Universal Naming Convention) format as it is shown in the example. Most often the shared folder on the target server machine is used. It must be remembered that it will be addressed on behalf of SQL Backup services working on both machines (primary and secondary SQL Server instances). The functionality of explicitly given parameters of the user’s network authorization (section ‘Authorization’) is envisaged in the program in order to prevent confusion of the access privileges applied. Check of the network folder access with the given parameters of both machines is realized by clicking ‘Check’ button. Our recommendation: always check the set parameters this way. One shall specify the path on the target machine in the ‘Destination folder’ field where files for direct restoration will be copied. Furthermore, we should set the target DB restoring options.
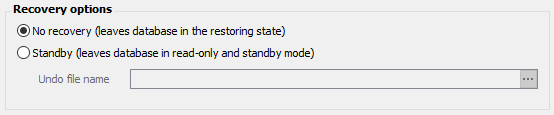
The target database is inaccessible for changes, but one can choose one of the two states in which it will stay after restoring logs. After this option is set we continue till the last step of the wizard and complete the log shipping step addition.
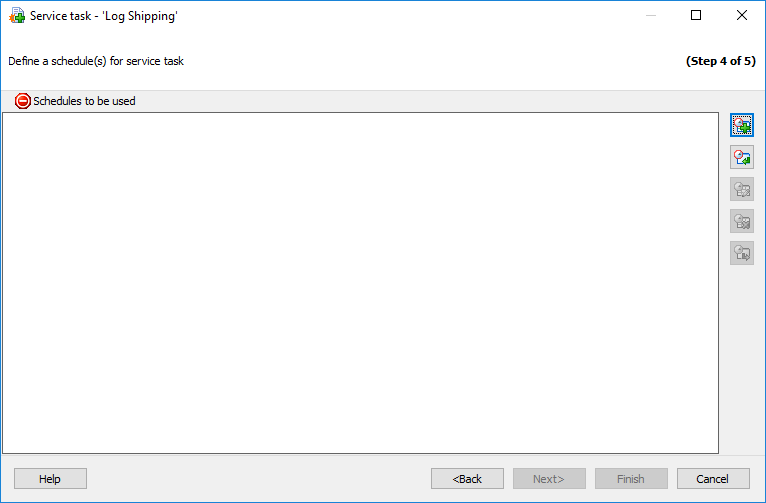
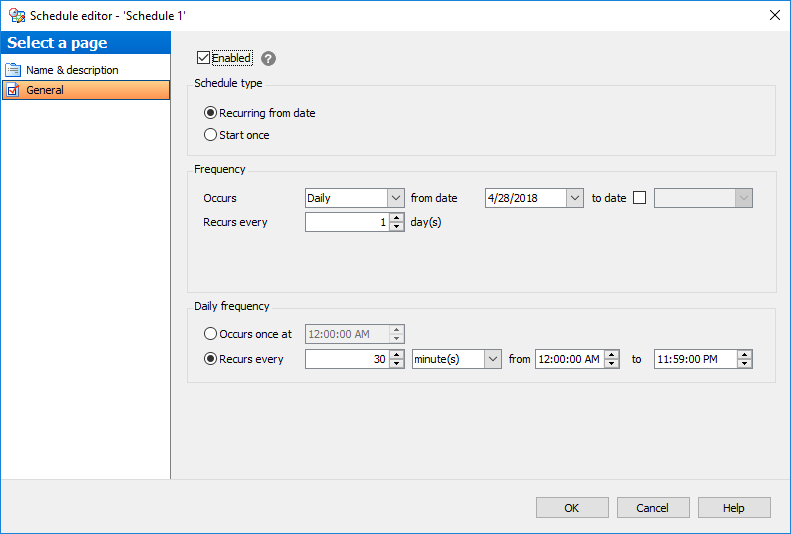
After we return to the policy creation wizard it is required to add the execution schedule. If the log shipping must happen every half an hour, the schedule may be adjusted as follows:
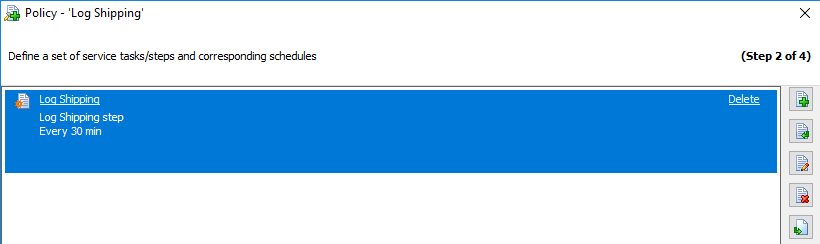
After the schedule settings are applied, the policy step will demonstrate the only task which contains one step (operation) and one schedule.
It means that the settings are correct and you can come over to the next step of policy properties adjustment – notification adjustment. It is enough to choose only the target server instance for alert because restoration status is more important than backup status and is actually the status of the whole policy, after that we should set the event and the mail.

After this you should go to the step 4 and apply the policy by clicking the ‘Finish’ button. While deploying the policy settings to both servers the full database backup copy will also be transferred.
Execution control
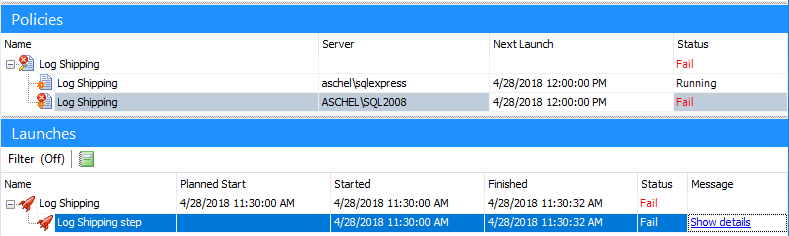
To be able to see the log shipping task execution status one should select the created solution and created policy in the ‘Policies’ section. The general policy status will be reflected in the column ‘Status’ of the ‘Policies’ section. Statuses of the separate executions will be reflected in the ‘Status’ field of the ‘Launches’ section.
If an error occurs on one of the servers during the execution, one should expand the policy tasks in the ‘Policies’ section to see the details, then choose the task having the ‘Fail’ status, choose the launch with the ‘Fail’ status in the ‘Launches’ section, unfold its steps and click ‘Show details’.
The whole step log will be displayed in the open window. If the problem is eliminated one can choose any failed launch, right-click it and select ‘Ignore error for selected launches’. This will correct the total policy status.
In conclusion, it should be noted that if the task has failed due to some reason on the target server, at the moment of the next launch the program will attempt to restore all the early unrestored log backup files to provide the correctness of the database state and the possibility of subsequent restore operations.


