Online Documentation for SQL Manager for DB2
Managing partitions
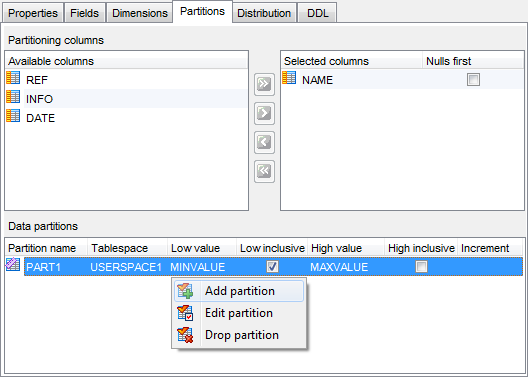
The Partitioning tab of Table Editor allows you to create, edit or drop table partitions (for DB2 version 9 and higher; if you use DB2 version 8, you will be allowed only to select columns for automatic partition creation).
Partitioning columns
To select a column, you need to move it from the Available columns list to the Selected columns list. Use the ![]()
![]()
![]()
![]() buttons or drag-and-drop operations to move the columns from one list to another.
buttons or drag-and-drop operations to move the columns from one list to another.
![]() Nulls first
Nulls first
Check the option, if you want null values compare high. If the option disabled, null values compare low.
Note: When a table is created, you will never be allowed to change partitioning columns for this table (in DB2 version 9 and higher).
Right-click within the Data partitions area to display the context menu allowing you to add a new partition, edit or drop partitions.
Partition management tools are also available through the Navigation bar of Table Editor.
The Partition Editor dialog allows you to set partition properties.

Data partition name
Specify a name for the data partition. The name must not be the same as any other data partition defined for the table. If the name is not specified, the 'PART' string followed by an integer value will be automatically assigned to the partition by the server to make the name unique for the table.
Tablespace
Use the drop-down list to specify the table space where the data partition is to be stored.
Limit specification
Use the ![]() Low value inclusive,
Low value inclusive, ![]() High value inclusive options to include/exclude the threshold values to/from the partitioning range.
High value inclusive options to include/exclude the threshold values to/from the partitioning range.
Specify Low type and High type values and the values in the column list to set the boundaries of the partition.


