Online Documentation for Data Export for Oracle
Step 1 - Setting connection options
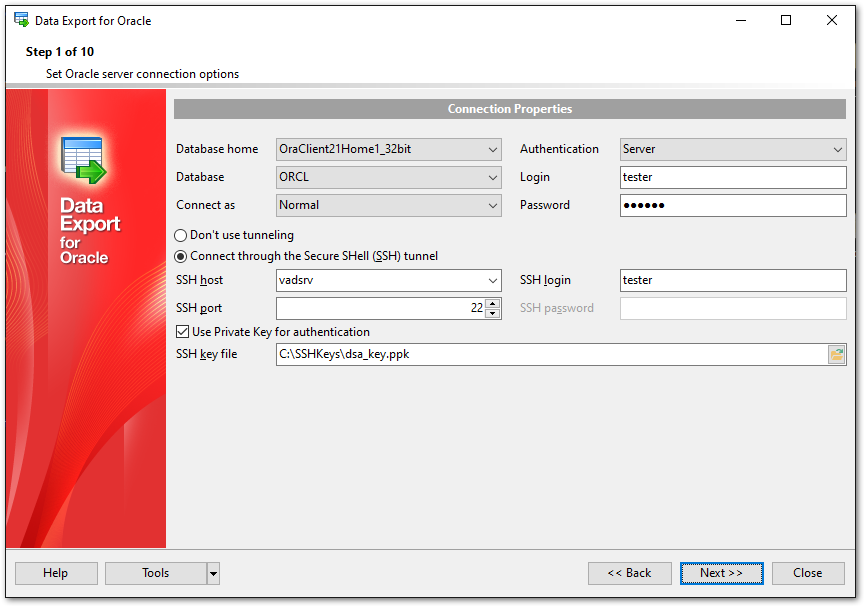
At this step you should specify necessary settings to establish connection to the source Oracle database.
Connection settings
Database Home
Specify your Oracle Home storage for this connection.
Connect as
Select the type of connection to be established: Normal (by default), SYSDBA, SYSOPER.
Authentication
Select the type of the authentication to be used for the connection: Server or Windows authentication.
If Server has been selected as the authentication type, you should also provide authentication settings: Login and Password.
The default superuser name is 'SYS' (for Oracle 9.0 and higher) and the default password is 'change_on_install'.
After that it is necessary to specify the database you are going to work with: type in the database name in the Database field or select one in the drop-down list (the drop-down list is only available if more than one Oracle database are registered in the TNS file).
Note: If no database are registered in Oracle Client (DB list is empty in this case), then you need to add registration info manually.
If you are using the EMS SQL Management Studio for Oracle version of Data Export for Oracle then the Select registered database button is available. Click this button to pick a database already registered in the EMS SQL Management Studio in the Select Host or Database dialog.
![]() Connect through the Secure Shell (SSH) tunnel
Connect through the Secure Shell (SSH) tunnel
Select this option to establish connection to an intermediate SSH server and forward all Oracle commands through the secure tunnel.
To setup the connection via SSH tunnel, input the following values in the corresponding fields:
SSH host is the name of the host where SSH server is running
SSH port indicates the port where SSH server is activated
SSH login stands for the user on the machine where SSH server is running (Note: it is a Linux/Windows user, not a user of Oracle server)
SSH password is the Linux/Windows user password
For details see SSH tunneling options.
When you are done, press the Next button to proceed to the next step.


