Online Documentation for DB Extract for SQL Server
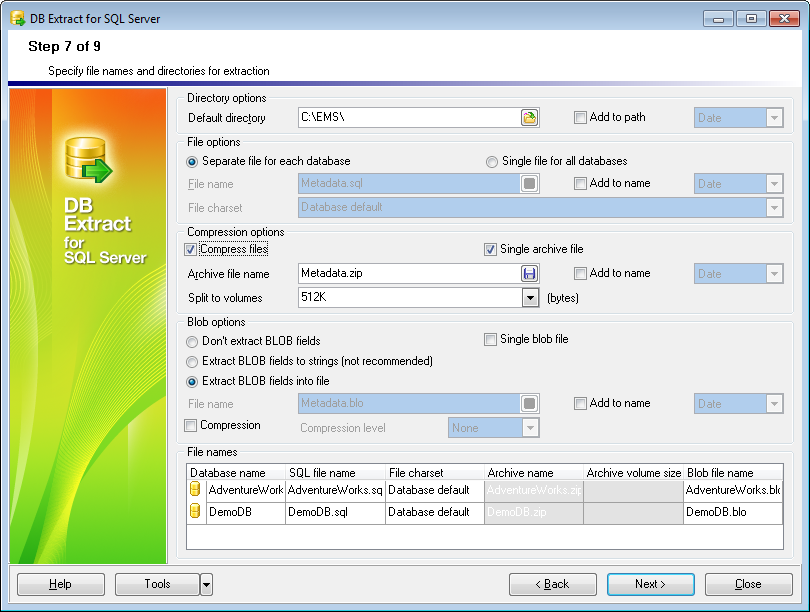
Step 7 - Specifying file names and directories
At this step you should specify the file name and the directory where the result script will be saved.
Directory options
Default directory
Type in the path or use the ![]() button to specify the default directory for the result files to be placed in.
button to specify the default directory for the result files to be placed in.
![]() Add to path
Add to path
Check this option to add current date, time or datetime (can be specified at the corresponding drop-down list) to the folder name.
File options
This group of options allows you to specify whether the source databases are to be placed into a single SQL script file or divided into several files of smaller size, each for a separate extracted database. This option is only available if objects from several databases have been specified for extraction.
File name
Set a name for the result *.sql file and type in or use the ![]() button to specify the path to this file on your local machine or on a machine in the LAN.
button to specify the path to this file on your local machine or on a machine in the LAN.
![]() File charset
File charset
Choose the necessary charset for the file.
![]() Add to name
Add to name
Check this option to add current date, time or datetime (can be specified at the corresponding drop-down list) to the filename.
Compression options
![]() Compress files
Compress files
Check this option if you wish to add the result SQL script to a ZIP file.
![]() Single archive file
Single archive file
Check this option to indicate whether the result SQL script is to be placed into a single ZIP archive file or divided into several archive files of smaller size, each for a separate extracted database. This option is only available if objects from several databases have been specified for extraction.
Archive file name
Set a name for the compressed *.zip file and type in or use the ![]() button to specify the path to this archive file on your local machine or on a machine in the LAN.
button to specify the path to this archive file on your local machine or on a machine in the LAN.
![]() Add to name
Add to name
Check this option to add current date, time or datetime (can be specified at the corresponding drop-down list) to the archive filename.
Split to volumes
If compression in a single archive is enabled you can split the archive to volumes of defined size. The size of an archive volume is in bytes by default, kilobyte if the value is followed by 'K' and megabyte if the value is followed by 'M'.
BLOB options
In this group of options you can determine whether BLOB fields are not to be extracted, extracted as strings, or extracted into a separate file. If the latter is selected, you also need to specify the File name (the *.blo file where the BLOB data are to be stored) and the location of the file on your local machine using the ![]() button.
button.
Note: The SET BLOBFILE statement will be added to the result script when extracting the BLOB fields into a file. This statement is correctly executed only in EMS products.
![]() Compression
Compression
Check this option if you wish to compress the file containing BLOB data.
Compression Level
Define the desired compression level to be applied for the file: None (selected by default), Normal, Fastest, Best.
![]() Add to name
Add to name
Check this option to add the current Date, Time or both to the specified name.
File names
This grid allows you to view the summary of the result *.sql and *.zip files selection.
Database name
This column represents the databases corresponding to the specified *.sql (*.zip) files (if the ![]() Separate file for each database option has been selected).
Separate file for each database option has been selected).
SQL file name
This column represents the list of *.sql files, each for a separate extracted database.
Archive name
This column represents the list of *.zip archive files, each for a separate extracted database.
When you are done, press the Next button to proceed to the next step of the wizard.


