Online Documentation for Data Import for SQL Server
TXT
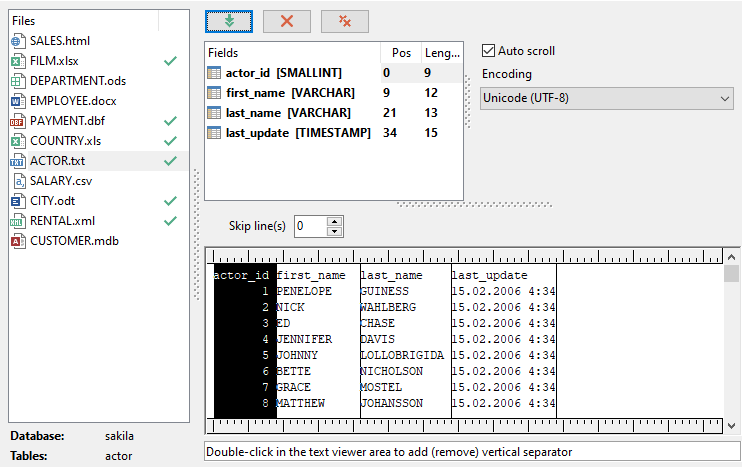
Set correspondence between the source text file columns and the target SQL Server table fields:
- select a field of the target SQL Server table in the Fields list;
- double-click in the text viewer area to add vertical separators delimiting the source column bounds;
- click the area between the separators to assign the column to the selected target table field - the selected source column gets black highlight;
- repeat the operation for all the fields you need to be included in the import process.
The Fields list also allows you to view the following values:
Pos represents the starting point of your selection;
Length displays the width of the selected area.
You can change these parameters manually or by moving the slider in the grid.
If necessary, you can choose to skip a defined number of the source file lines using the Skip lines spin-edit.
If the source text file and the destination SQL Server table have the same order of columns, you can use the ![]() Auto Fill Columns button to set correspondence between them automatically.
Auto Fill Columns button to set correspondence between them automatically.
The source file character set can be defined at the Encoding field.
![]() Auto scroll
Auto scroll
This option scrolls the document automatically when you switch to the next field for mapping.
When you import data to a newly created table, the Analyze button appears. Use this button for automatic field creation.
To remove all correspondences, press the ![]() Clear All button.
Clear All button.
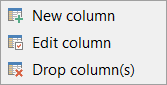
If you choose to import data to the newly created table, at this step you need to create necessary fields. Use the corresponded context menu item to manage fields.
Note: If table was properly created or already exists, it will be marked with a tick ![]() . If an error occurs during table creation, this table will be marked with a cross
. If an error occurs during table creation, this table will be marked with a cross ![]() .
.
Click the Next button to proceed to the Setting base data formats step of the wizard.


