
Online Documentation for Advanced Data Import for RAD Studio VCL
MS Excel
First select the dataset field from the 'Fields' drop-down list. Then select the corresponding cells by clicking row or column caption (to select the whole row or column) or clicking the individual cells, using Shift and Ctrl keys.
You can also define the corresponding cells manually in the 'Cells' edit field. Use semicolon to separate multiple cells.
After you select all the corresponding cells for the current table field, proceed to another field and repeat all these operations for each dataset field.
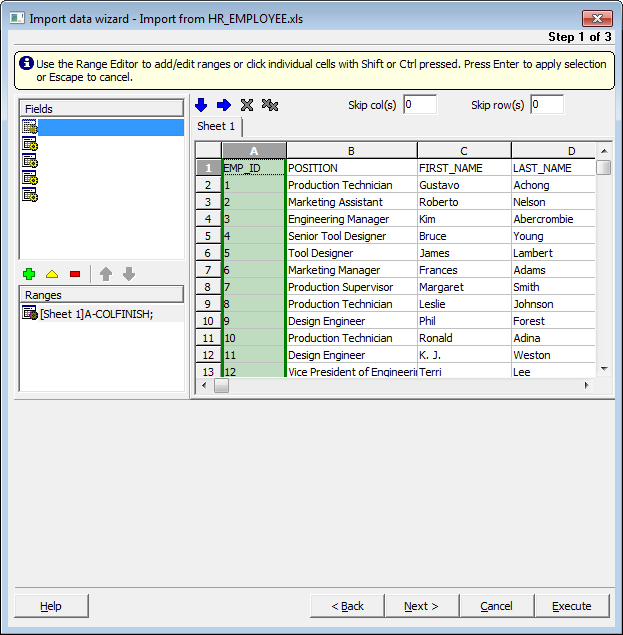
If you don't want some first rows or columns of the source table to be imported, set the number of such rows in the 'Skip ... first row(s)' and 'Skip first ... col(s)' edit fields.
Auto fill cols - use this button to set the correspondence between the source table columns and the dataset fields automatically. It is convenient if they are ordered in the same way. First table column will correspond to the first dataset field, second column to the second field, etc. If quantity of the table columns exceeds quantity of the dataset fields, then the last columns will have no correspondence.
Auto fill rows - use this button to set the correspondence between the source table rows and the dataset fields automatically. It is convenient if they are ordered in the same way. First table row will correspond to the first dataset field, second row to the second field, etc. If quantity of the table rows exceeds quantity of the dataset fields, then the last rows will have no correspondence.


