
Online Documentation for SQL Manager for MySQL
Setting report options
The Options dialog allows you to specify a number of settings pertaining to the printing report.
To open the dialog, open the Design Report ![]() menu available on the toolbar and select the Preferences item.
menu available on the toolbar and select the Preferences item.
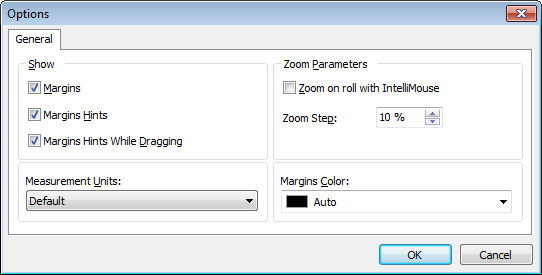
Show
Tick off the elements to show in the printing report (margins, margins hints, margins hints while dragging).
Use the Measurement Units drop-down list to select the unit of measure that will be used in report settings: default, inches, or millimeters.
Zoom Parameters
![]() Zoom on roll with IntelliMouse
Zoom on roll with IntelliMouse
If this option is selected, you can zoom in/out by scrolling up/down (with a Microsoft® mouse or a compatible mouse used).
Zoom Step
Use the spinner control to specify the percentage of the original page size to be considered as one zoom step.
Use the Margins Color drop-down list to select the color that will be applied to the report margins.
The Report Title dialog allows you to specify the report title text and properties.
To open the dialog, use the Title... ![]() button available on the toolbar.
button available on the toolbar.
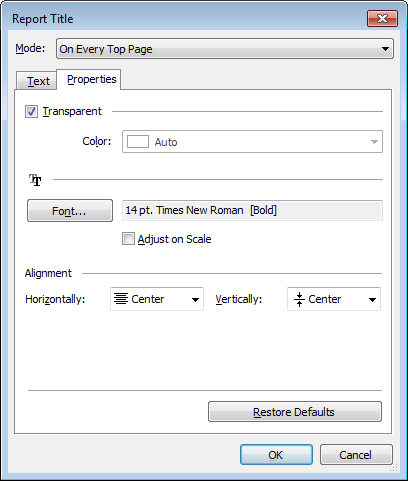
Mode
Use the drop-down list to select where the report title should be displayed on the first page, on every top page, or not displayed at all.
Text
Use the edit box to enter the text of the report title.
Properties
![]() Transparent
Transparent
If this option is selected, the report title will be drawn transparent.
Use the Color drop-down list to select the color that will be applied to the report title (enabled if the ![]() Transparent option is not selected).
Transparent option is not selected).
Click the Font... button to specify title font properties using the standard Font dialog. The font name and size are displayed in the gray area next to the Font... button.
![]() Adjust on scale
Adjust on scale
If this option is selected, the title can be adjusted on scale.
Alignment
Use the Horizontally drop-down list to select the type of horizontal alignment to be applied to the report title: Left, Center, or Right.
Use the Vertically drop-down list to select the type of vertical alignment to be applied to the report title: Top, Center, or Bottom.
To restore the default title properties, click the Restore Defaults button.
The Date and Time dialog allows you to specify the date/time formats to be used in the report.
To open the dialog, open the Title... ![]() menu available on the toolbar and select the Date and Time... item.
menu available on the toolbar and select the Date and Time... item.
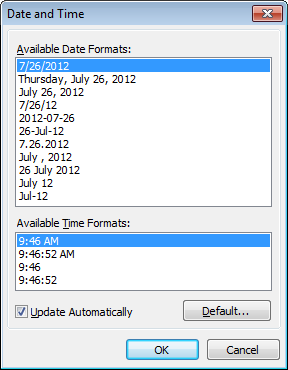
Select the preferable values from the Available Date Formats and the Available Time Formats lists. If necessary, you can specify that the date/time will be updated automatically.
To apply the default date/time format, click the Default... button.
The Page Number Format dialog allows you to specify the formats for page numbers to be used in the report.
To open the dialog, open the Title... ![]() menu available on the toolbar and select the Page Numbering... item.
menu available on the toolbar and select the Page Numbering... item.
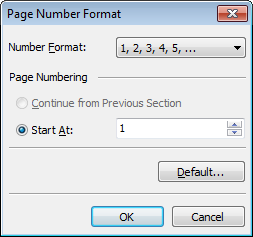
Select the preferable number format from the Number Format drop-down list.
Use the Page Numbering section to specify whether page numbering should continue from the previous section (if any) or start at the specified number.
To set the default numbering values, click the Default... button.
The Zoom dialog allows you to zoom the report page more better representation.
To open the dialog, open the Zoom ![]() menu available on the toolbar and select the Setup zoom... item.
menu available on the toolbar and select the Setup zoom... item.
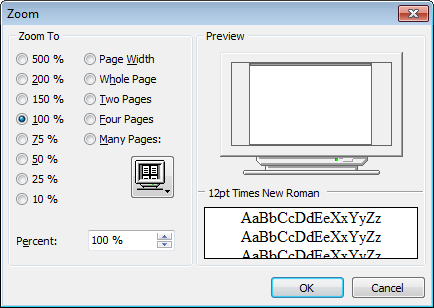
Select the preferable percentage of zoom value (500%, 200%, 150%, 100%, 75%, 50%, 25%, 10%) or specify one of frequently used values:
![]() Page Width
Page Width
![]() Whole Page
Whole Page
![]() Two Pages
Two Pages
![]() Four Pages
Four Pages
![]() Many Pages (click the chart below and select the item you need)
Many Pages (click the chart below and select the item you need)
If necessary, you can set a custom percent value using the Percent spinner control below.
The Preview area on the right illustrates the changes you have made.
|
See also: |


